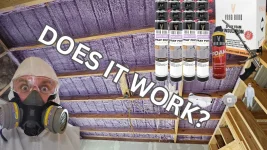
Spray foam insulation has been a game-changer for modern DIYers, but it’s no secret that applying it can be a messy and challenging task. My first experience with Vega Bond's Purplecoat self-expanding closed-cell foam reinforced that while it’s a fantastic product, preparation, technique, and patience make all the difference. Here’s a detailed breakdown of the process, what went right, what could have been better, and a few extra tips I picked up from research into how insulation was handled before modern solutions like spray foam.
Product Affiliate Link -https://amzn.to/481C4np Vega Bond SF001 12-Packs Set, Premium Single Component Self Expanding, Purplecoat Closed Cell Insulation Spray Foam, Acoustic Spray (240 Board Feet Coverage)
By the end of this project, I came away with not only a better-insulated room but also a newfound respect for professionals who do this daily. While the Vega Bond kit did the job admirably, the process reaffirmed the importance of preparation and learning from trial and error.
If you’ve tried spray foam insulation or have tips from your own experiences, feel free to share them below. Let’s continue to find sustainable and effective solutions together.
Product Affiliate Link -https://amzn.to/481C4np Vega Bond SF001 12-Packs Set, Premium Single Component Self Expanding, Purplecoat Closed Cell Insulation Spray Foam, Acoustic Spray (240 Board Feet Coverage)
Lessons Learned from the Process
The Vega Bond Purplecoat foam delivered great results in terms of coverage and adhesion. A single kit covered the 12x12 ceiling of my workspace with about 1-3 inches of insulation. However, using this product required a steep learning curve:- Application Distance Matters: Keeping the nozzle 12-18 inches from the surface was critical for achieving even layers. Too close, and the foam was uneven and messy. Too far, and it didn't adhere properly.
- The Right Nozzle Tip Is Key: I started with the wrong tip, which made precise application near impossible. Switching to a flat tip provided much better control, especially in corners. Test your spray rate in a small section before committing to a larger area.
- Plan for Mess: Spray foam is incredibly sticky, and controlling the flow requires finesse. If you're not careful, you’ll find yourself cleaning up blobs of foam from every surface in the vicinity.
- Understand Can Pressure: The foam comes out with varying pressure, especially as the can empties. It’s crucial to learn how the product behaves at the start, middle, and end of the can to achieve consistency.
- Safety First: Spray foam involves volatile chemicals, and proper precautions are non-negotiable. Wear gloves, goggles, and a respirator in a well-ventilated area.
Historical Context: Insulation Before Spray Foam
Before self-expanding foam revolutionized the industry, people relied on a variety of natural materials to insulate homes:- Straw and Hay Bales: In rural areas, straw or hay was often packed into walls for insulation. These materials provided decent thermal resistance and were readily available. However, they posed a fire risk and could attract pests.
- Wool and Animal Hair: In colder regions, sheep’s wool or animal hair was used to stuff walls and clothing for insulation. Wool remains an eco-friendly insulation option today, as it’s naturally fire-retardant and resistant to mold.
- Mud and Clay: Early settlers used wattle and daub—a combination of mud, clay, and straw—to create thick walls that provided insulation and weather resistance.
- Cotton or Linen Rags: In some areas, old textiles were repurposed to insulate homes, packed into cracks and crevices to block drafts.
Additional Tips for Spray Foam Insulation
- Work in Layers: Avoid spraying too thick in one pass. Build up layers gradually to ensure even coverage and prevent cracking.
- Temperature Control: Check the manufacturer’s recommended application temperature. Foam adheres better and expands more predictably when conditions are optimal.
- Seal Cracks Before Spraying: For best results, pre-seal large gaps or cracks with caulk or weatherstripping. This reduces foam waste and ensures a tight seal.
- Prep the Workspace: Cover floors, windows, and any surfaces you don’t want foam on with plastic sheeting or painter’s tape. Once cured, spray foam is nearly impossible to remove cleanly.
- Recycle the Empty Cans: Check local recycling programs for proper disposal of empty spray foam cans, as they are considered hazardous waste.
Comparing Alternatives
While Vega Bond Purplecoat is effective, it’s worth noting other options in the insulation market:- Fiberglass Batts: Easier to install for walls but lack the airtight seal of spray foam.
- Rigid Foam Boards: Excellent for flat surfaces and less messy but challenging to install in tight spaces.
- Natural Options: Wool and cotton insulation are eco-friendly but costlier and less available.
By the end of this project, I came away with not only a better-insulated room but also a newfound respect for professionals who do this daily. While the Vega Bond kit did the job admirably, the process reaffirmed the importance of preparation and learning from trial and error.
If you’ve tried spray foam insulation or have tips from your own experiences, feel free to share them below. Let’s continue to find sustainable and effective solutions together.